 (Image via
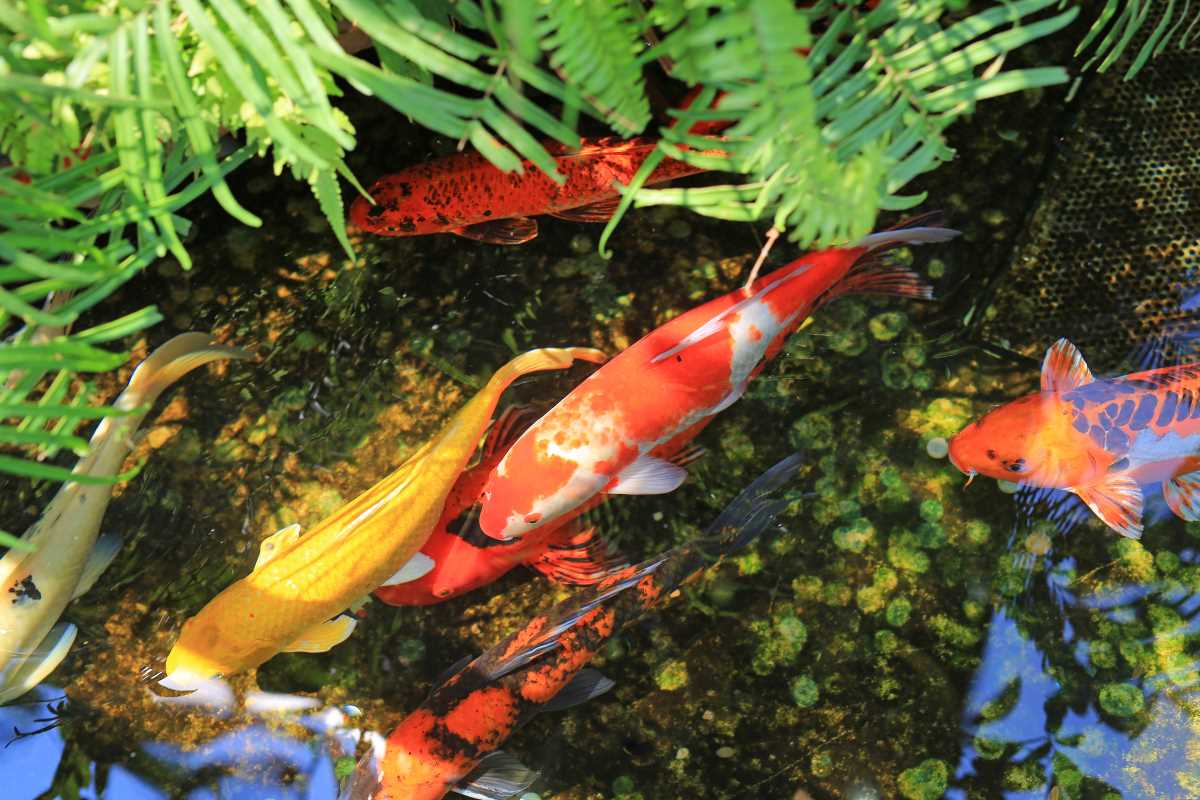
There is something deeply captivating about watching koi fish glide through the water. Their vibrant colors and graceful movements can turn a simple backyard pond into a living work of art. A koi pond is more than just a water feature; it is a dynamic ecosystem and a hobby that can bring years of enjoyment and tranquility. Unlike a basic garden pond designed for water lilies and goldfish, a koi pond is a specialized environment built to support these magnificent, large-bodied fish. They require more space, deeper water, and a robust filtration system to thrive. Building one might seem like a daunting task, but it is a project that is well within the reach of a dedicated DIYer. It requires careful planning and a commitment to doing things right, but the reward is a stunning focal point for your garden that provides a serene escape from the everyday hustle. Let's dive into the essential tips for building a successful koi pond from the ground up.
Planning: The Blueprint for Success
Before you ever pick up a shovel, you need a solid plan. A koi pond is a significant investment of time and money, and proper planning is the single most important factor for long-term success.
First, consider the location. Your pond needs a spot that is relatively level and receives at least four to six hours of direct sunlight per day, which is essential for the health of both the fish and any aquatic plants. However, try to avoid placing it directly under large deciduous trees. The shade is nice, but the constant barrage of leaves in the fall will create a maintenance nightmare and can negatively impact water quality as they decompose.
Next, think about size and depth. This is where a koi pond differs significantly from a simple water garden. Koi can grow to be two or three feet long, and they need room to swim. A good rule of thumb is a minimum of 1,000 gallons of water, with a depth of at least three to four feet. This depth is crucial; it provides the fish with protection from predators like raccoons and herons, and it offers a stable, cooler environment during hot summers and a warmer, non-freezing zone at the bottom during winter.
Excavation and Liner Installation
This is the most physically demanding part of the build. Once you have marked your desired shape with rope or spray paint, it is time to start digging. As you excavate, create vertical sides rather than gently sloping ones. This maximizes the water volume and makes it harder for predators to wade into the pond. It is also a good idea to create at least one "shelf" or ledge about a foot below the water level around the perimeter. This can be used for placing marginal aquatic plants.
Once the hole is dug to your specified depth, carefully remove any sharp rocks, roots, or debris. The next layer is a protective underlayment fabric. Do not skip this step; it acts as a crucial cushion, protecting your expensive liner from punctures.
After the underlayment is in place, you can install the pond liner. The best choice for a koi pond is a 45-mil EPDM rubber liner. It is incredibly durable, flexible, and fish-safe. Lay the liner loosely in the hole, creating neat folds and pleats to fit the contours. Leave plenty of excess liner around the edges—at least two feet on all sides. You will use this to secure the edges and create a barrier.
The Heart of the Pond: Filtration
If a pump is the heart of a pond, the filtration system is its liver and kidneys. Koi are beautiful, but they are also messy eaters and produce a lot of waste. Without a powerful filtration system, the water would quickly become toxic with ammonia. A proper koi pond filtration system has two main components:
- Mechanical Filtration: This is the first stage, designed to remove solid waste like fish poop and uneaten food. This is often accomplished with a bottom drain that pulls water and debris from the bottom of the pond, and a skimmer that removes floating debris like leaves from the surface.
- Biological Filtration: This is where the magic happens. After the solids are removed, the water flows through a biological filter. This filter contains media (like special beads, mats, or lava rock) with a large surface area that hosts beneficial bacteria. These bacteria convert toxic ammonia from fish waste into nitrites, and then into less harmful nitrates, which plants can absorb as fertilizer.
You cannot over-filter a koi pond. It is always better to invest in a filtration system rated for a larger pond than the one you have. This ensures your water stays crystal clear and your fish remain healthy.
Bringing It to Life: Water, Rocks, and Fish
With the liner and filtration system in place, you can begin to add rocks to the edges to hide the liner and create a natural look. Secure the liner by building a small trench around the perimeter, folding the liner into it, and backfilling with soil or stone. Place your edging rocks on top of this. Avoid placing rocks or gravel on the bottom of the pond; this traps waste and makes cleaning nearly impossible. A smooth, bare liner bottom is best for koi health.
Fill the pond with water and turn on your filtration system. Let the system run for at least a week to allow the water to dechlorinate and for the biological filter to begin to "cycle" or establish its bacteria colonies. You can purchase a pond starter kit to help speed up this process.